

By the Water Velor editorial team · Last updated November 8, 2026. The limits in this guide come from U.S. EPA drinking water standards, which can change, so check current values before you act on a result.
If you own a private well, nobody tests your water for you. There’s no utility sending a yearly report, and the EPA doesn’t regulate private wells. That job is yours, and it’s easier to get wrong than most people expect.
The most common mistake isn’t picking the wrong lab. It’s contaminating the sample before it ever leaves your kitchen. A dirty faucet or a rinsed bottle can make perfectly clean water fail a bacteria test, and then you’re stuck guessing whether the problem is real.
This guide walks you through how to test well water the way a field technician would: which contaminants matter, when to test, how to pull a clean sample, how to find a state-certified lab, how to fill out the paperwork, and what to do when something comes back high.
Quick answer: how do you test well water? Pick a clean, non-threaded cold tap, remove the aerator and sanitize the spout, run the water for 5 to 10 minutes, fill the lab’s bottles without rinsing them, label them, and get them to a state-certified lab on ice within the lab’s hold time (usually 24 to 30 hours for bacteria). Compare the results to EPA limits.
Why Private Well Owners Have to Test Their Own Water
Public water systems are tested on a legal schedule. Private wells aren’t. The EPA sets limits called Maximum Contaminant Levels (MCLs) for public systems, but those same numbers are what almost every health agency uses as the benchmark for your well, too. The EPA’s own guidance on protecting your home’s water puts the responsibility on the well owner.
The usual advice from public health agencies is to test at least once a year for bacteria, nitrates, total dissolved solids, and pH. Test more often if you’ve had flooding, a nearby spill, a repair on the well, or a change in taste, smell, or color. Also test before you buy a home with a well, and any time a baby or pregnant person will be drinking the water.
The 3-Tier Well Contamination Matrix (US EPA Standards)
It helps to sort what you’re testing for into tiers. Not every result carries the same urgency.
- Tier 1: Primary contaminants. Health risks. These have enforceable EPA limits for public systems.
- Tier 2: Secondary contaminants. Mostly about taste, odor, and staining. EPA guidelines are non-enforceable.
- Tier 3: Site-specific contaminants. Only relevant if something near your property points to a risk (a gas station, a mine, a military base, a farm).
Here’s the quick-reference chart. Numbers are EPA limits as of this writing; always check the lab report’s own reference column too.
| Contaminant | Tier | EPA limit | Typical source | Why it matters |
|---|---|---|---|---|
| Total coliform / E. coli | Primary | 0 (absent) in drinking water | Septic leaks, surface runoff, animal waste | Illness, stomach infections; signals a pathway for other contaminants |
| Nitrate (as N) | Primary | 10 mg/L | Fertilizer, manure, septic systems | Dangerous for infants (blue baby syndrome) |
| Nitrite (as N) | Primary | 1 mg/L | Same as nitrate | Same infant risk |
| Arsenic | Primary | 0.010 mg/L (10 ppb) | Natural bedrock, some mining | Cancer risk, skin and heart effects over time |
| Lead | Primary | Action level 0.015 mg/L (goal is zero) | Old plumbing, solder, brass fixtures | Nervous system harm, worst for children |
| Copper | Primary | Action level 1.3 mg/L | Corrosive water in copper pipes | Stomach upset, liver and kidney effects at high levels |
| Uranium | Primary | 0.030 mg/L (30 µg/L) | Natural geology | Kidney toxicity |
| Radium-226/228 (combined) | Primary | 5 pCi/L | Natural geology | Increased cancer risk |
| Fluoride | Primary / Secondary | 4.0 mg/L (primary), 2.0 mg/L (secondary) | Natural geology | Dental and bone effects at high levels |
| Benzene (a VOC) | Primary | 0.005 mg/L | Fuel leaks, gas stations | Blood effects and cancer risk |
| PFOA and PFOS | Primary | 4 ppt each | Firefighting foam, manufacturing, military sites | Linked to cancer, thyroid, and immune effects |
| Iron | Secondary | 0.3 mg/L | Natural rock and soil | Rust stains, metallic taste |
| Manganese | Secondary | 0.05 mg/L | Natural rock and soil | Black staining, bitter taste |
| Chloride and sulfate | Secondary | 250 mg/L each | Road salt, geology | Salty taste, laxative effect (sulfate) |
| Total dissolved solids | Secondary | 500 mg/L | Minerals, salt | Taste, scale buildup |
| pH | Secondary | 6.5 to 8.5 | Geology, acid rain | Corrodes pipes if low (leaches lead and copper) |
| Hardness | Not regulated | No EPA limit | Calcium and magnesium in rock | Scale on fixtures and appliances, not a health issue |
Two notes on this chart. First, the EPA has said it will keep the 4 parts per trillion limits for PFOA and PFOS. In May 2026 it also proposed giving water systems until 2031 to comply, and proposed rescinding limits for four other PFAS compounds (PFHxS, PFNA, GenX, and a combined Hazard Index). Those proposals aren’t final, so check the EPA’s PFAS page before you act on a borderline result. Second, the lead number is an “action level,” not a true MCL, and the EPA has been tightening lead rules. Many labs and state health departments flag any detectable lead in a private well, which is a sensible approach.
Industrial and Environmental Triggers for Immediate Testing
An annual test is the baseline. These situations mean you shouldn’t wait.
Agricultural Runoff and Shallow Water Tables
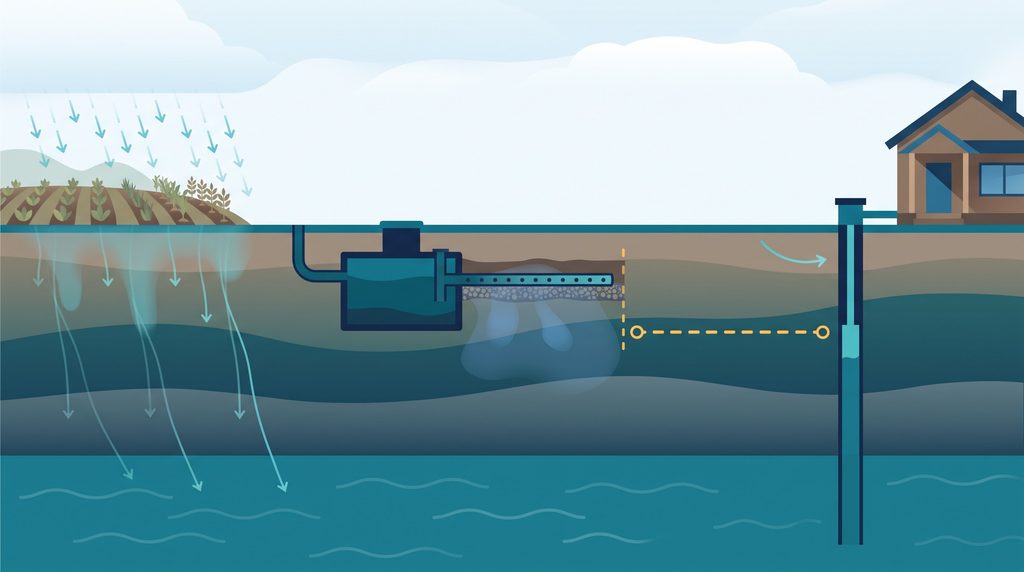
If your well is shallow, or if it’s in sandy or fractured-rock ground where surface water moves down quickly, timing matters. The riskiest windows are the early spring thaw and the days right after a heavy rain. Snowmelt and storm water carry fertilizer, manure, and livestock waste into the ground, and fecal bacteria can reach a shallow aquifer in a matter of days.
Signs it’s time to test now:
- Standing water or a flooded wellhead after a storm
- Water that suddenly looks cloudy or tastes or smells different
- A neighbor’s well test came back positive
- Livestock, a new field application of manure, or a septic repair nearby
Safety callout: the 100-foot rule. A common benchmark is to keep your wellhead at least 100 feet from septic tanks, drain fields, livestock yards, and manure storage. Your state’s minimum may be 50 feet or more than 100, so check your local health department. If your well sits closer than the rule allows, test more often, and not just once a year.
Industrial Zones, Fracking, and Urban Encroachment
Don’t buy every panel a lab offers. Match the test to what’s actually around you. Here’s an unbiased guide to when the pricier specialty panels make sense.
| Your surroundings | Add this to the basic panel | Why |
|---|---|---|
| Farmland or livestock | Nitrate, nitrite, bacteria, pesticide screen if recommended locally | Fertilizer and manure runoff |
| Gas station, dry cleaner, refinery, or fuel storage within about a half mile | VOC panel (benzene, toluene, solvents) | Leaking tanks and solvents travel in groundwater |
| Mining or abandoned mine land | Heavy metals (arsenic, lead, cadmium, mercury, uranium) | Metals leach from disturbed rock |
| Oil and gas drilling or fracking | Baseline test before drilling starts, then repeat: chloride, TDS, VOCs, methane | A “before” result is your proof if something changes |
| Military base, airport, firefighting training site, or manufacturing plant | PFAS panel | Firefighting foam and industrial use |
| Older home with older plumbing | Lead, copper, pH | Corrosion happens inside your house |
| Nothing unusual nearby | Annual basic panel only | Skip the expensive extras |
For most households, a PFAS or full VOC test isn’t necessary unless one of those risk factors applies. A good lab, or your county health department, will tell you the same.
The Professional 5-Step Tap Sampling Protocol
This is the part that decides whether your results mean anything. Get the lab’s bottles first, and read the lab’s own instructions. If they differ from this guide, follow the lab.
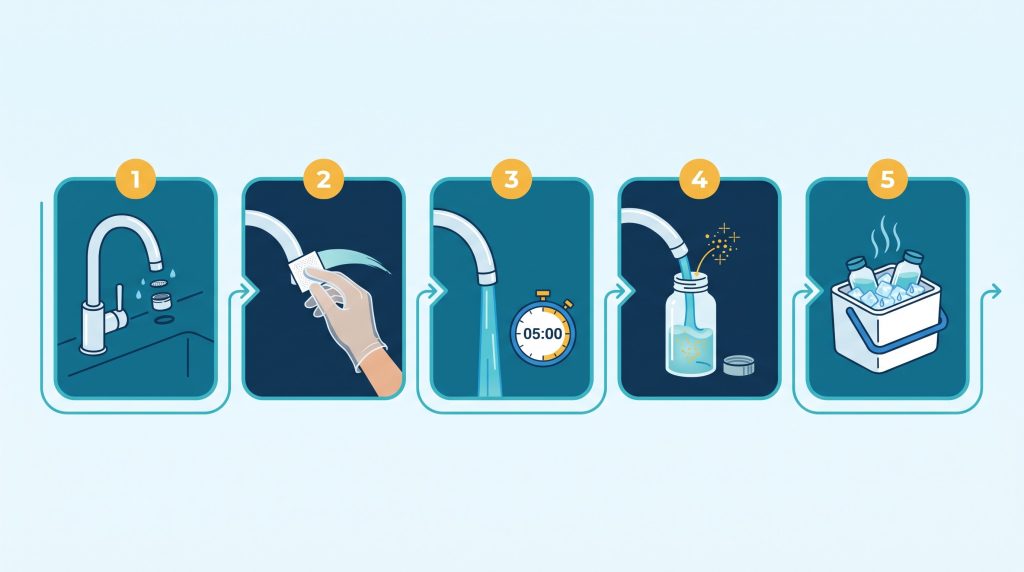
Step 1: Faucet Selection and Sterilization
Pick the right tap. A good test tap is the one closest to the well or pressure tank, before any filter or softener, on a cold line.
Don’t use:
- Outdoor hose bibbs with threads (they collect dirt and biofilm)
- Swing-spout kitchen faucets or sprayers (they’re hard to clean and harbor bacteria)
- Any tap connected to a filter, softener, or other point-of-use device
- A leaky tap, or one with water dripping from around the handle
Then sanitize it:
- Remove the aerator screen on the end of the spout.
- Scrub the inside and outside of the spout with a 70% isopropyl alcohol swab or wipe. Let it air dry.
- If the faucet is all metal, a brief pass with a lighter flame is another accepted method. Never flame plastic, and skip it entirely if the lab says not to.
- Wash your hands, and don’t touch the inside of the spout again.
Step 2: Main Line Purging and Cold Chain Capture
Now flush the line. Standing water in your pipes isn’t what’s in your well, so run the cold tap at a steady, finger-width stream for 5 to 10 minutes. This pulls fresh groundwater through the system. If you have a pressure tank, 10 minutes is the safer bet.
The zero-rinse rule. Never rinse the lab’s bottles. Many contain preservatives, like sodium thiosulfate, which neutralizes chlorine in the water so it doesn’t kill bacteria before the lab counts them. Rinsing washes the preservative out and ruins the sample.
Filling the bottles:
- Reduce the flow to about the width of a pencil to stop splashing.
- Keep your fingers off the inside of the cap and the neck of the bottle.
- Fill bacteria bottles to the fill line, leaving a little air gap. Fill chemical bottles as the lab directs.
- Cap tightly right away.
Purge timer: start it while you run the cold tap, then fill your bottles when it ends.
5:00
Step 3: Label Everything
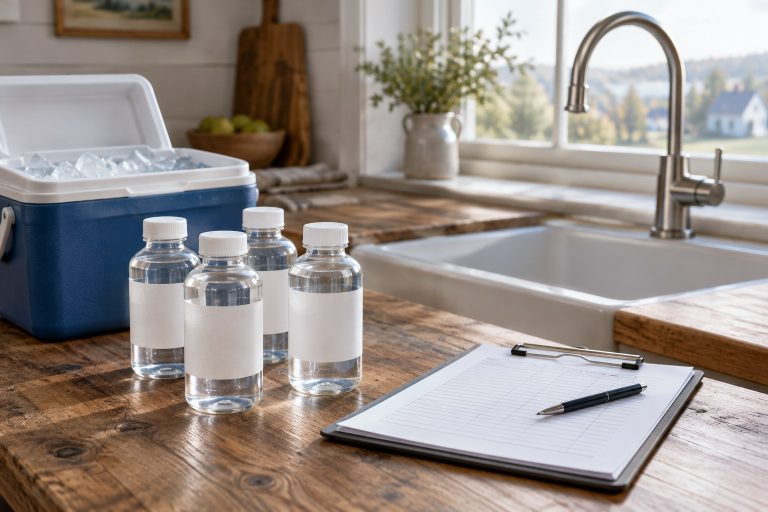
Write on the bottle: your name, sample location (for example, "kitchen cold tap"), the date, and the exact time you collected it. That time must match your paperwork.
Step 4: Keep It Cold
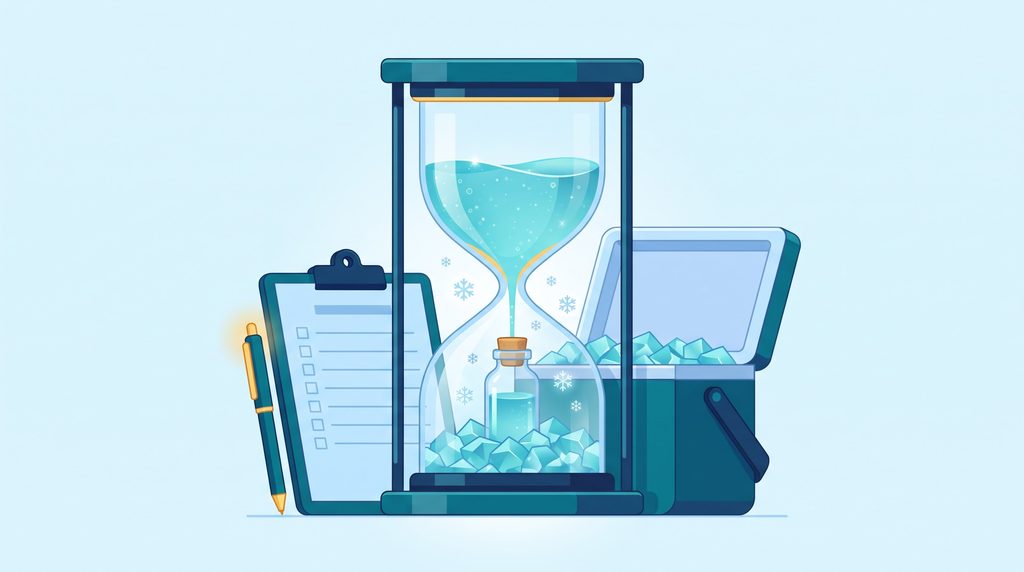
Put bottles in a cooler right away. Keep them at about 39°F (4°C), but never frozen. Use double-bagged wet ice, not loose ice that melts into the bottles, and not gel packs that sit at freezer temperature and might freeze the sample.
Step 5: Get It to the Lab
Bacteria samples are alive, and the clock matters. Most labs want them delivered within roughly 24 to 30 hours, and some allow up to 48. Nitrate samples are similar. Collect on a Monday through Wednesday morning, so your sample doesn't sit in a closed lab over the weekend.
Demystifying Lab Logistics: Forms, Fees, and Timelines
Finding State-Certified Drinking Water Laboratories
Use a lab that your state has certified for drinking water analysis. Certification means someone independent has checked the lab's methods and quality control. The EPA recommends that consumers use state-certified laboratories for water testing.
How to find one:
- Open the EPA's page of contact information for certification programs and certified laboratories, or search for your state's drinking water laboratory certification program.
- Select your state and look for labs certified for drinking water (not just wastewater or soil).
- Call the lab and ask which panel they recommend for private wells, the price, and the hold time.
- Your county or state health department can also point you to a lab, and some offer low-cost testing themselves.
A warning about free test kits. Be careful with "free water tests" offered by companies that sell water softeners or filtration systems. They usually use a quick field kit, not a certified lab, and the results often end in a sales pitch. Hardness is the favorite number to inflate, since it's easy to scare people with and it isn't a health issue. A certified-lab report is the only result worth acting on.
What does it cost? Prices vary by state and lab, so call for a quote. As a rough guide:
- Bacteria only: about $20 to $50
- Basic well panel (bacteria, nitrate, pH, TDS, hardness): about $50 to $150
- Comprehensive panel with metals and common contaminants: about $200 to $500 or more
- PFAS or full VOC panel: often $250 to $500 or more each
Completing the Chain of Custody (CoC) Document
The CoC form is the lab's proof that your sample was handled correctly. A mistake here can get your sample rejected. The fields are usually these:
- Client name, address, and phone/email: Who gets the report.
- Sample ID or site name: Must match the bottle label exactly.
- Sample type: Drinking water, private well.
- Collection date and time: Must match the bottle label to the minute.
- Collected by: Your name and signature.
- Tests requested: Check the specific panel or list each analysis.
- Preservatives: Note if the lab-provided bottles contained any.
- Temperature on receipt: The lab fills this in.
- Relinquished by / received by: Signatures and times each time the sample changes hands, including couriers.
The top reasons samples get rejected: mismatched times, no time recorded, a warm cooler, a cracked bottle, or going past the hold time. Take a photo of your completed form before you seal the cooler.
Shipping Checklist
Decoding Your Lab Results and Implementing Solutions
Reading the Lab Report: CFU, mg/L, and PPM
Lab reports look more complicated than they are. Here's the translation:
- mg/L = ppm. Milligrams per liter is the same as parts per million.
- µg/L = ppb. Micrograms per liter equals parts per billion.
- ng/L = ppt. Parts per trillion is the unit PFAS are measured in.
- CFU/100 mL. Colony-forming units per 100 milliliters, the way bacteria are counted. For drinking water, total coliform and E. coli should read absent or 0 CFU/100 mL.
- ND or < (a number). Not detected, or below what the lab can measure.
- pCi/L. Picocuries per liter, a measure of radioactivity.
Look at three columns: your result, the reporting limit, and the EPA limit. If your result is higher than the limit, that's a fail. If it's lower but close, retest in a few months.
Target Mitigation Systems for Chemical and Biological Failures
If something fails, don't panic, and don't buy equipment on the spot. First, stop drinking the water for the problem contaminant (use bottled water for drinking and cooking), then retest to confirm. Then match the fix to the problem.
| Test failure | Immediate action | Permanent solution |
|---|---|---|
| Total coliform or E. coli positive | Don't drink untreated water. Boil water for one full minute, or use bottled water. Find the cause: cracked casing, a poorly sealed cap, a nearby septic leak. | Shock chlorination to disinfect the well, then retest in 1 to 2 weeks. If bacteria return, install a UV disinfection system with a sediment pre-filter. |
| High nitrate or nitrite | Use bottled water, especially for infants and for formula. Don't boil it; boiling concentrates nitrate. | Reverse osmosis at the kitchen tap, or whole-house ion exchange. Fix the source if possible. |
| Arsenic | Use bottled water for drinking and cooking. | Reverse osmosis (often with an oxidation step first) or an arsenic-specific adsorptive media filter. |
| Lead or copper | Run the tap for a minute before use; don't use hot tap water for drinking. | Reverse osmosis or a certified lead-removal filter at the tap. Address corrosive water (low pH) with a neutralizer. |
| VOCs (such as benzene) | Use bottled water and ventilate shower areas. | Activated carbon filtration, whole-house if needed. Call your health department about the source. |
| PFAS | Use bottled water for drinking. | Activated carbon block, ion exchange, or reverse osmosis at the tap. Check the filter's certification for PFAS. |
| Iron, manganese, hardness | No health risk. Treat when stains or taste bother you. | Water softener, oxidizing filter, or iron filter. |
Look for filters tested and certified to the right standard (for example, NSF/ANSI standards for the specific contaminant). Treatment equipment needs ongoing maintenance, and a retest after installation will show whether it's actually working.
Frequently Asked Questions
How often should I test my well water?
At least once a year for bacteria, nitrates, TDS, and pH. Test again after flooding, a well repair, a change in taste or smell, or a nearby spill. Test for specialized contaminants only when a nearby risk exists.
Can I use a home test kit instead of a lab?
Home kits are fine for a quick screen, but they aren't precise and can't replace a state-certified lab, especially for bacteria, arsenic, lead, and PFAS. Use a kit to decide whether to test further, not to give the all-clear.
How long should I run the water before taking a sample?
Run the cold tap for 5 to 10 minutes at a steady, finger-width stream so you're drawing fresh well water instead of what's been sitting in your pipes.
Why did my bacteria test come back positive when my water seems fine?
Bacteria can't be seen, smelled, or tasted. A positive can also be a false alarm caused by a dirty faucet. Retest using the sterile protocol above before assuming the worst, but don't drink the water in the meantime.
Does the EPA regulate private wells?
No. The EPA's drinking water standards apply to public systems. Private well owners are responsible for their own testing, but they use the EPA's limits as the benchmark.
Conclusion: Test This Month, Not Someday
Testing your well isn't complicated once you know the details. A clean tap, a proper purge, unrinsed bottles, a cold cooler, and a state-certified lab will give you results you can trust. Then you can compare them to the EPA limits and fix only what actually needs fixing.
Your next step: Call a state-certified lab this week, ask for a basic private-well panel, and put the sample date on your calendar. Then bookmark this guide so you can run through the checklist when your bottles arrive. If you're not sure what a result means, ask your lab or county health department, or start with the EPA's private wells resources.
This article is for general education and isn't a substitute for advice from your local health department or a certified water professional.

[…] when a number comes back red. If you want a second walkthrough of the sampling basics, our earlier step-by-step guide to sampling, labs, and results covers the […]
[…] private wells, the process mirrors this step-by-step well water sampling and lab guide. If you are buying a house with a well, read the well water testing guide for home buyers before […]
[…] For the bigger picture, see our complete well water testing guide for home buyers and the general step-by-step well sampling, labs, and results guide. […]
[…] Photograph the labeled bottles at the tap before shipping. For a step-by-step walkthrough of sampling and reading results, see how to test well water. […]
[…] For a well, buy a lab test, not a hardware-store strip. A full walkthrough lives in our step-by-step guide to sampling, labs, and results for well water. […]
[…] tests your well for you. Follow our annual private well water testing parameters, and test for coliform bacteria and nitrate every year. Test for arsenic at least once, and again […]
[…] should run a baseline lab test now, while you still know what normal looks like. Start with our step-by-step well testing guide and the Water Testing section. City customers should read their utility’s annual Consumer […]